User details and permissions
There are four parts of a user setting. They are user information, notifications, assigned teams and permissions.
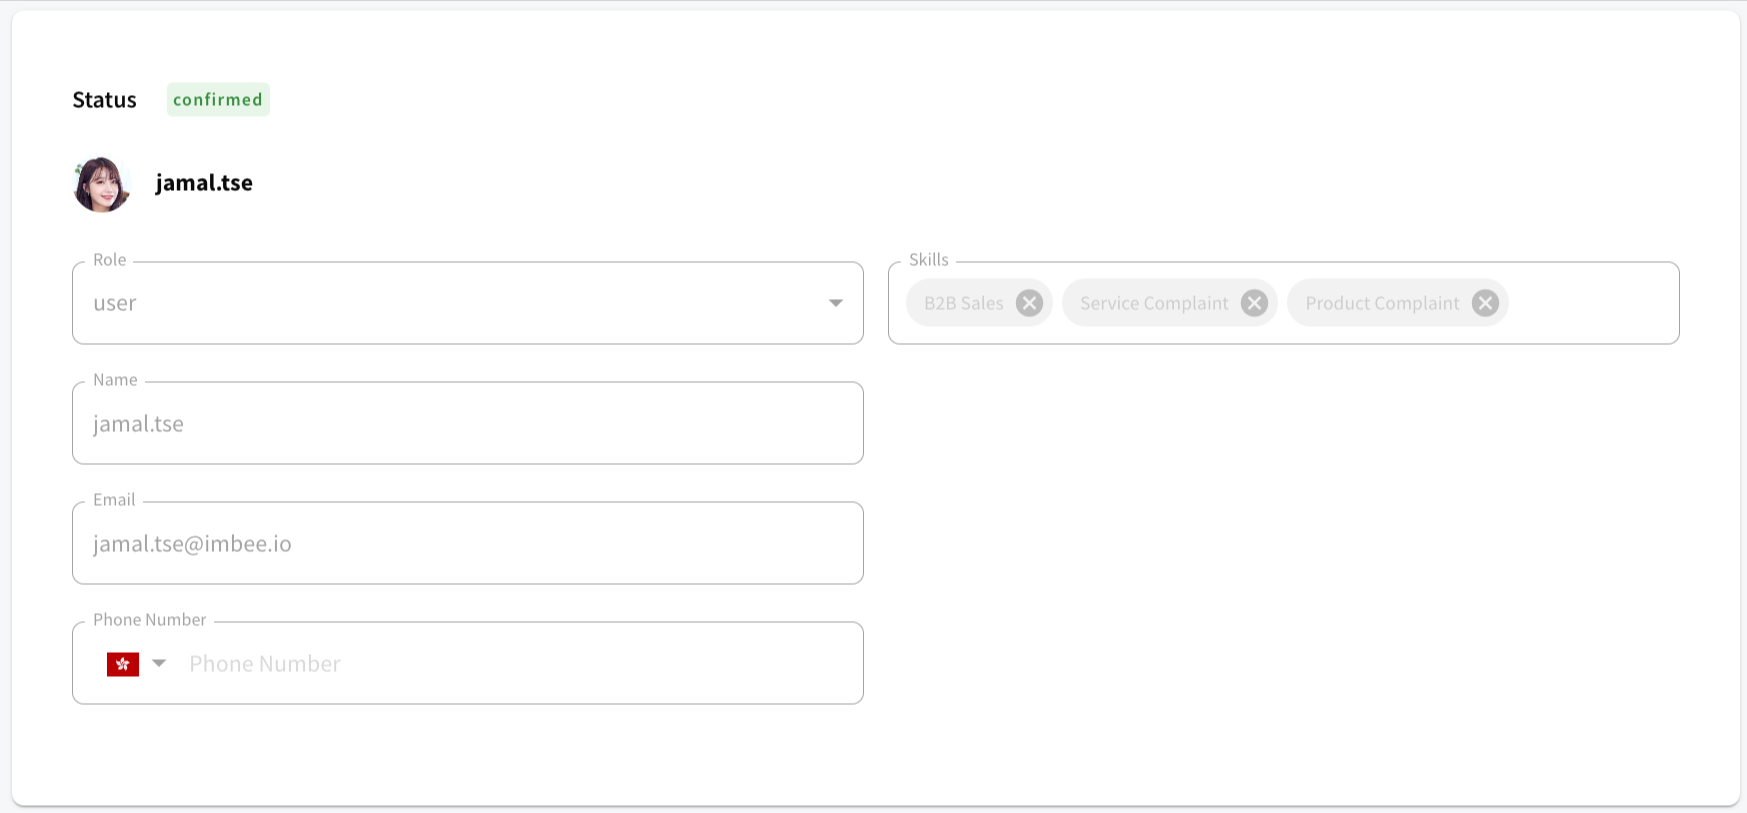
User information:
Role
There are two types of roles, which are admin and user. The only difference between user and admin is that admin will have Manage Users permission by default.
Name
Your display name in the platform
Email
Login email address
Phone number
Your PERSONAL phone number for receiving the notifications
Skills
The system will auto-assign the tickets to you if you have set up the chatbot which includes auto routing. It depends whether the tag of the ticket matches the skill set you have.
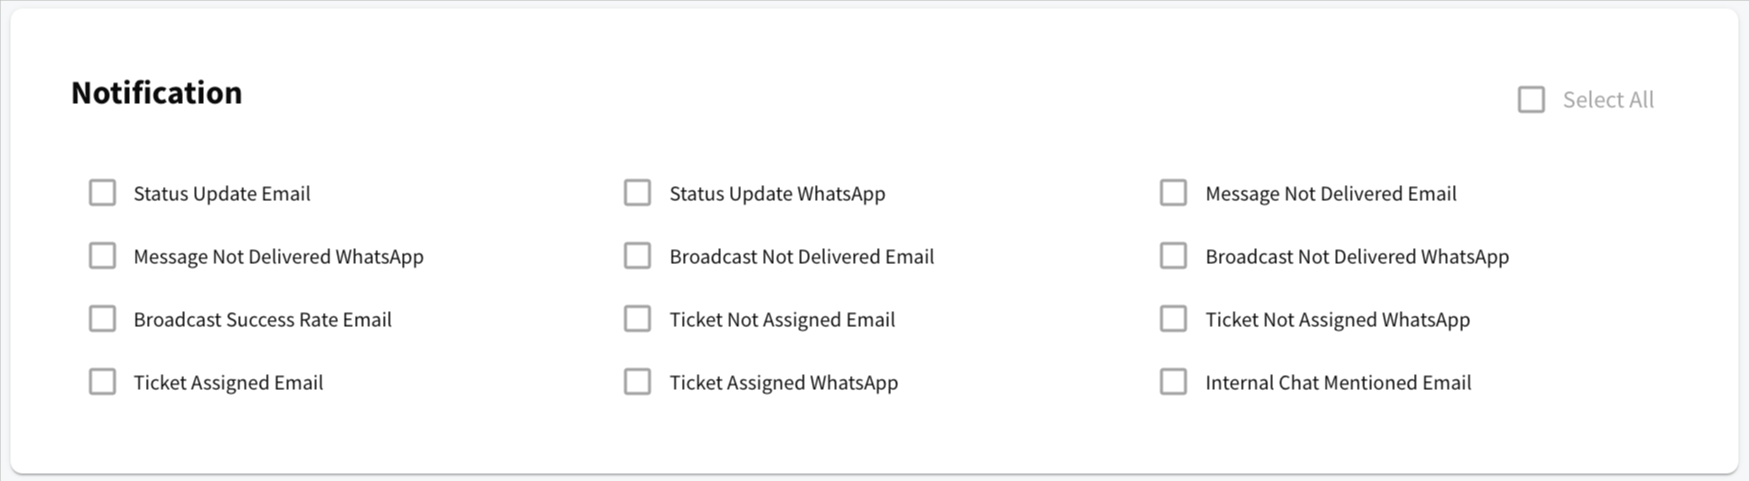
Notifications:
This is an external notification system which notify you via your login email address and your personal WhatsApp number.
Status update email / WhatsApp - Any status change of channel
Message not delivered email / WhatsApp - Any outgoing message which is failed to be sent out
Broadcast not delivered email / WhatsApp - This feature is end of support and our team will remove it
Broadcast Success rate email - Notify when the broadcast send rate is under 50%
Ticket not assigned email / WhatsApp - Any ticket which is in unassigned status
Ticket assigned email / WhatsApp - Any ticket assigned to you
Internal chat mentioned email - Any internal team chat which your colleagues mentioned you
Assigned Teams:
The section shows which team you are in. To know more what team is, please refer to this page.
pageTeamsYou can also assign a team to the user here. Click Manage Assigned Teams, select the team and click Confirm.
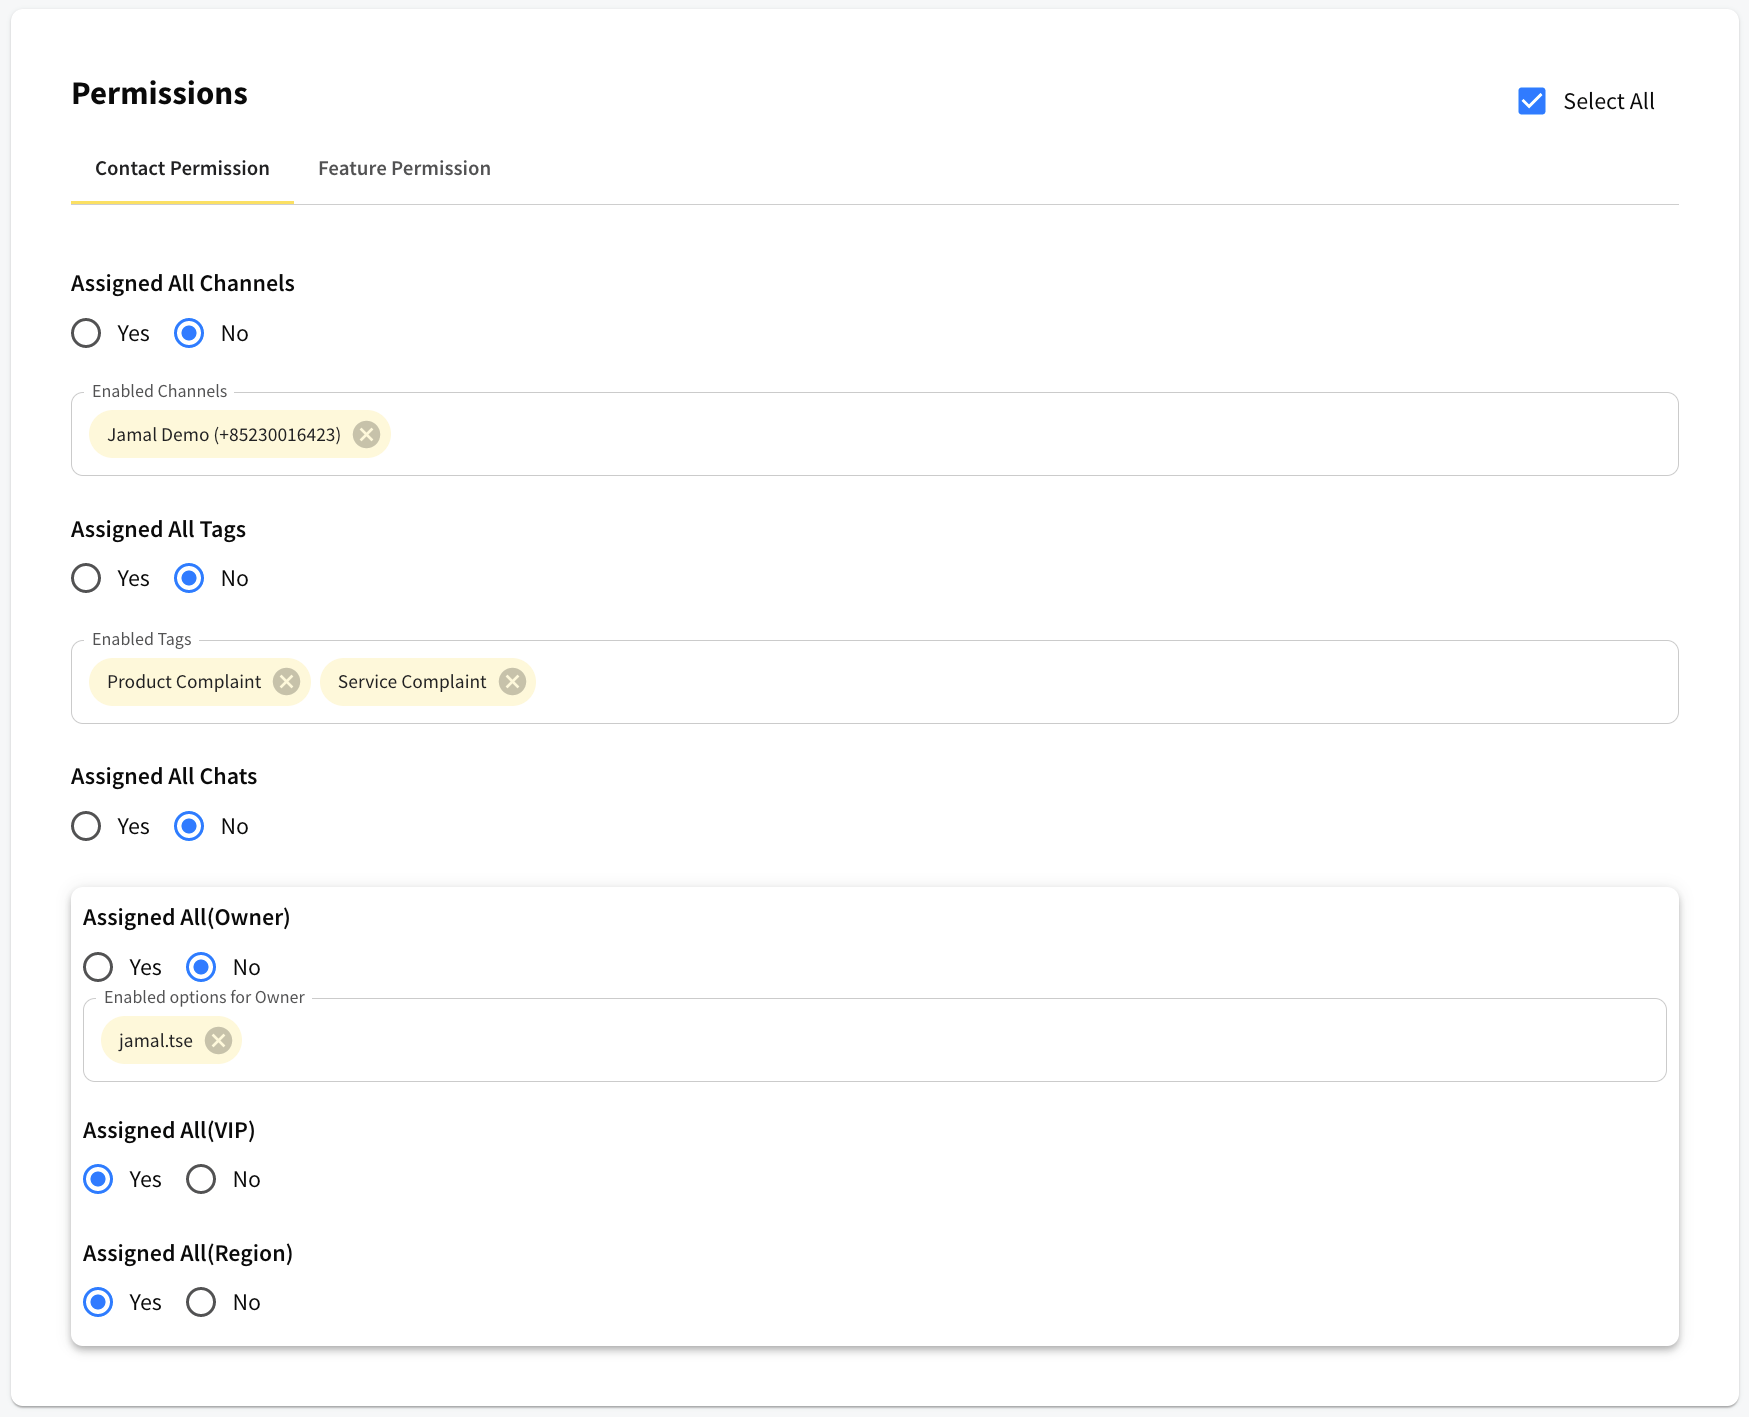
Permissions:
This section can further be divided into two parts, which are contact permissions and feature permissions.
Contact permissions
Contact permissions control the tickets that the users can see inbox.
Take the below settings as an example. The user can only see the ticket which is under Jamal Demo channel, the tag is Product Complaint OR Service Complaint, and the owner (contact field) is jamal.tse.
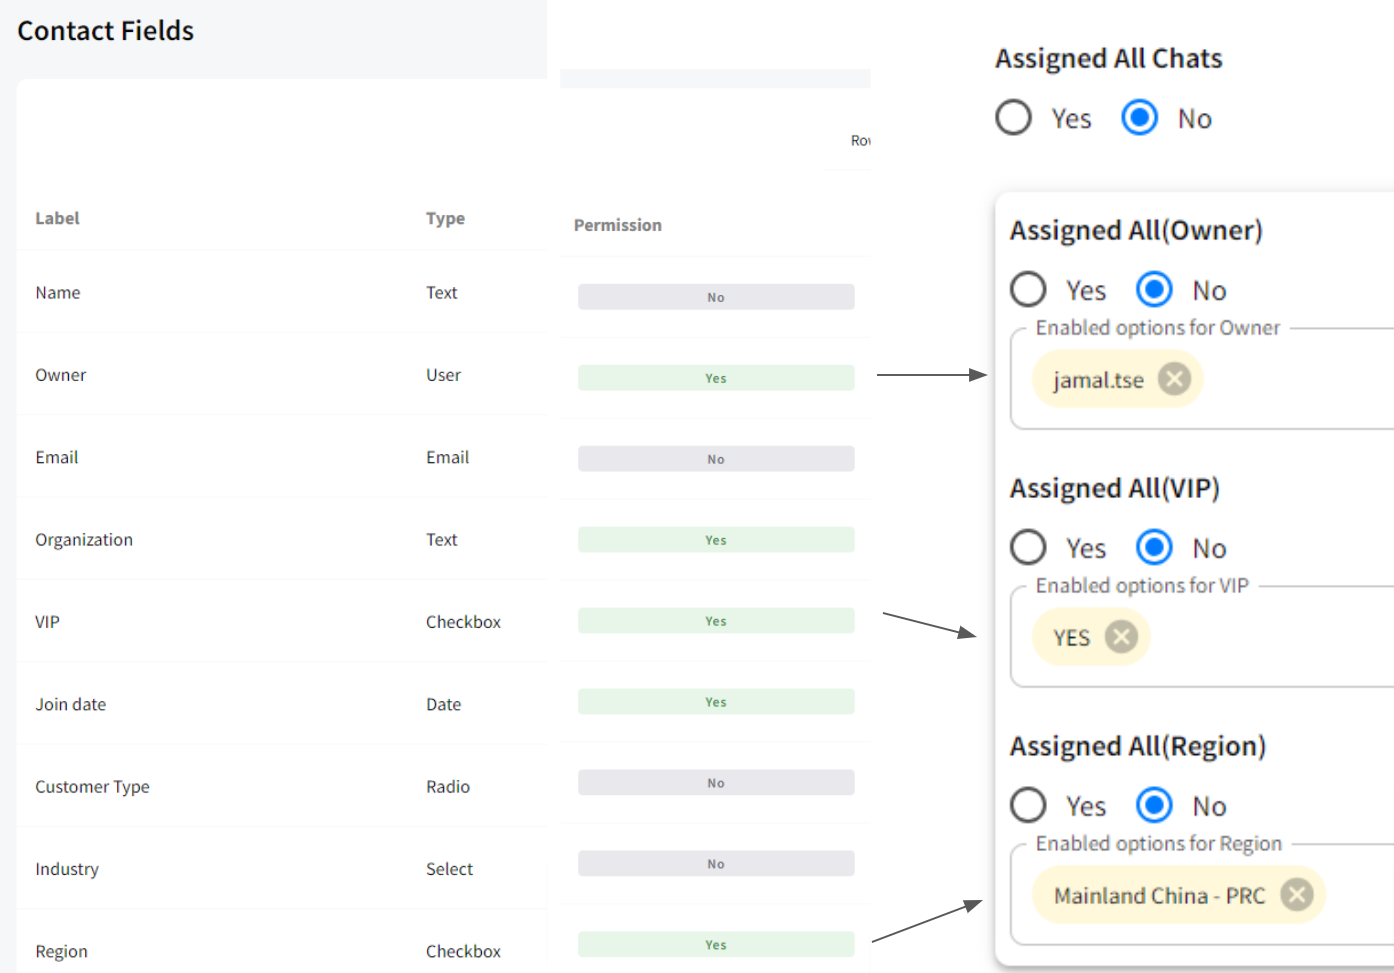
To become one of the options under Assigned All Chats, you have to enable Permission for the particular contact field in which the type of the contact field has to be user, radio, select or checkbox.
Contact permission setting tip:
If you would like the user to have the right to view the tickets assigned to him, you can set all the options as No, as the assignee of the ticket always has the right to view the ticket.
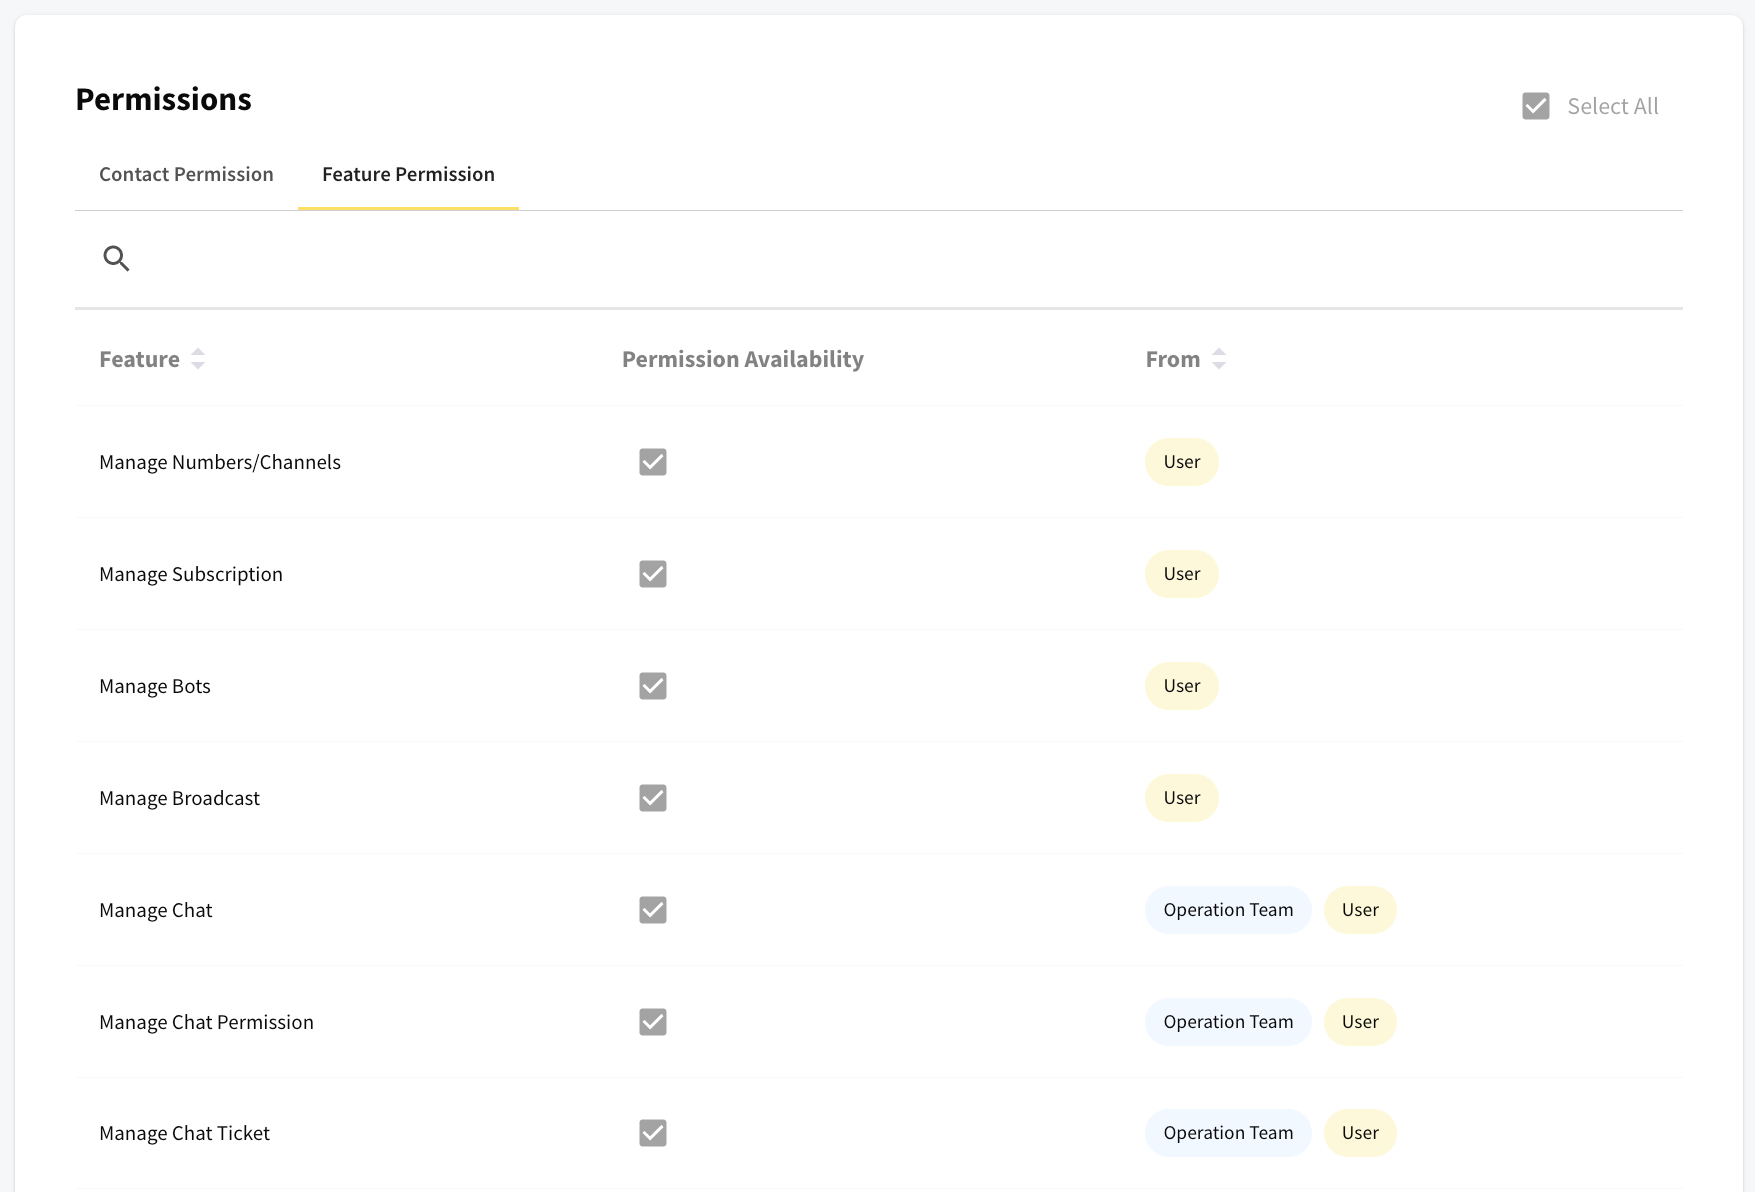
Feature permissions
This part determines the access control to different features. In view mode, you will see the feature permissions you have and the source (whether the permission is granted from user permission/ team)
View Dashboard - Access to Dashboard section
Manage Report - Access to Report section
Data Export - Access to Export Jobs section, users can export chat message in inbox
Manage Chat - Access to inbox section
Manage Chat Ticket - Access to Chat ticket section and manage the ticket (e.g. close a ticket, tag a ticket or assign a ticket to a user) in inbox
Manage Quick Replies - Access to Quick Replies section, users can create new quick replies in inbox
Internal Team Chat - Access to Internal Team Chat Feature in inbox
Manage Broadcast - Access to Broadcast and Template section
Manage Contact Group - Access to Contact group section
Schedule Message - Access to Schedule Message feature
Manage numbers/Channels - Access to Channel section
Manage Subscription - Access to Subscription section
Manage Bot - Access to Chatbot (version 1) section
Manage client invoice - Access to invoicing section, users can create new invoices in inbox
Manage Contact - Access to both Contact and Contact Fields section, users can edit the customer profile in inbox
Manage Users - Access to Users section
Manage Widget - Access to Website Widget section
Manage Tags - Access to Tags section
Team - Access to Teams section
Last updated